
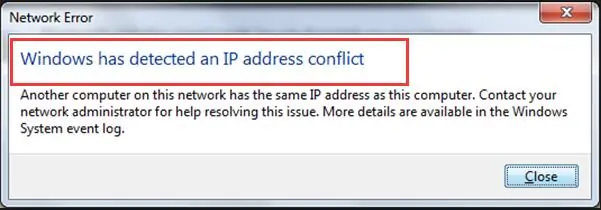
This can be an annoying error for Windows 7 and Windows 10 users, where this error pops up, and the connection drops:
An IP address is a unique identifier given to every device that connects to the internet. It’s like a unique virtual “address” for every device, and if everything works properly, the IP address of every device is actually unique.
However, if this error has come up, obviously something is wrong, and the router is for whatever reason assigning the same IP address to two or more devices on a single network, which means neither device can actually connect to the internet.
There are loads of free IP addresses on any network, so this error is almost always fixable. It just requires identifying the cause of the conflict and taking some appropriate troubleshooting steps.
Here is a summary of the main thing to try to fix this error:
- Reset your router and devices.
- Disable & Re-enable your network adapter
- Remove any static IPs and go back to Automatic IP
- Make sure any gamers are not using the same IP
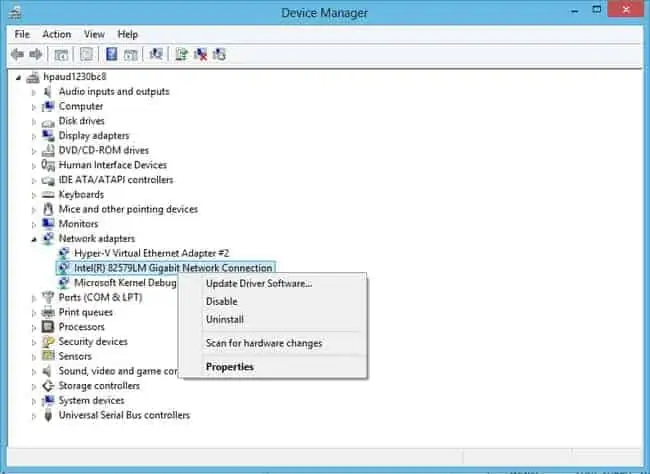
- Update Your Network Driver Card
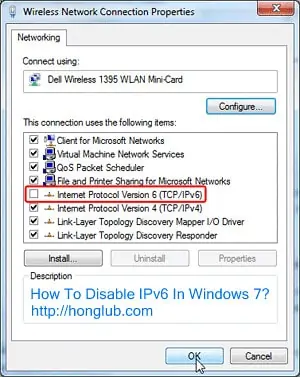
- Disable IPv6 on your device
- Restore a VPN connection is in use
- Change the DHCP lease time on the router.
- Change the Wireless Encryption mode to WPA-2
Let’s run though each of these troubleshooting steps in more detail below.
1. Reset Your Router & Devices
This step is pretty self explanatory, but as with many network errors, just quickly rebooting devices and refreshing connections can help fix these errors.
Here are some quick things to try
- Reset your device
- Reset your router (most routers have a quick reset button to push in these days).
- You can also try resetting your router and all devices on your home network (not just the one you are using), to refresh all connections.
- Power cycle your router and device, fully unplugging them for a few minutes and then plugging them back in.
- If your device has a toggle switch/tab that turns the Wi-Fi on/off, then try toggling this off and on again to refresh the connection.
- If you are using an ethernet cable, try unplugging it and plugging it back in again.
These are pretty obvious steps but can sometimes fix this error, as resetting the devices can sometimes cause router to dish out brand new IP addresses and resolve any conflicts.
2. Disable & Re-enable Your Network Adapter
This is closely related to the above steps, but is another way of refreshing your connection on the device.
- Windows 7 – Go to Control Panel —- Network and Internet —– Network and Sharing Center
- Click Change Adapter Settings on the left
- For Windows 10 – Click the Windows sign (bottom left corner, then the Settings cog. Click Network & Internet, and under Advanced Network Settings, click Change Adapter Settings
- A list of wired and wireless internet connections configured on your computer should appear. Right click on the one you are currently using (wired or Wi-Fi) and then click Disable.
- Wait a few seconds for it to fully disable, then right click and Enable again.
- See it this restores the connection.
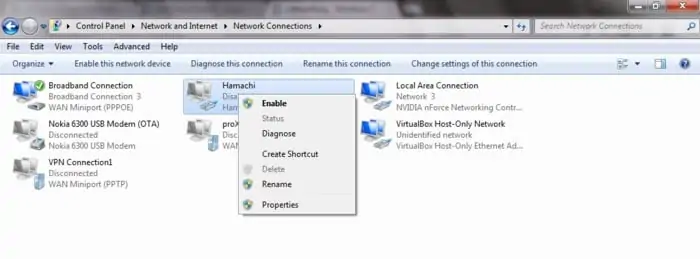
Disabling and re-enabling your network adapter can sometimes solve IP conflicts
3. Remove a Static IP & Switch to Automatic IP
Another thing that can cause this error is when users manually assign a static IP on their device, instead of letting the router do it automatically. Windows has settings which allows users to easily do this, but it is not really the technically correct way of doing it, because what if someone else on the same network also configures their device to have exactly the same IP? This is when this error occurs.
To fix this, you need to remove the static IP assigned on the device and switch back to an Automatically assigned IP by the router.
Here are the steps for doing this on Windows:
- Windows 7 – Go to Control Panel —- Network and Internet —– Network and Sharing Center
- Click Change Adapter Settings on the left
- For Windows 10 – Click the Windows sign (bottom left corner, then the Settings cog. Click Network & Internet, and under Advanced Network Settings, click Change Adapter Settings
- A list of wired and wireless internet connections configured on your computer should appear. Right click on the one you are currently using (wired or Wi-Fi) and then click Properties
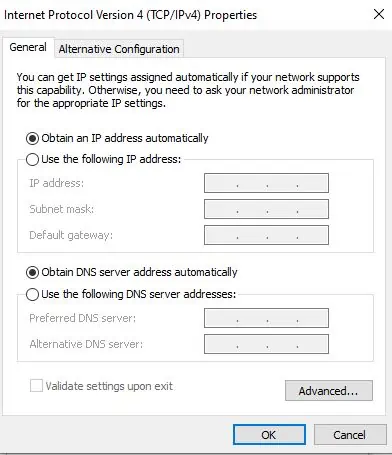
- Select Internet Protocol Version 4 (TCP/IP) and then click Properties again
- The screen below should come up. Make sure the two boxes highlighted in red are selected – Obtain an IP address automatically and Obtain DNS automatically.
- Click OK and exit settings.
Video guide on how to do this:
We’ve now covered the most common causes and solution to this IP conflict error. Now let’s turn to a couple more specialized solutions, that may work, but only in much rarer cases.
7. Restore Connection to VPN if in Use
Again this is a more rare cause of this problem, but it can be that using a Virtual Private Network or VPN can generate this error message, especially if the connection to the service suddenly drops, or is interrupted by placing the computer into rest mode.
When users wake the PC up from sleep mode, this error can appear. To resolve, simply reconnect to the VPN service, and it will select it’s own custom IP address again, and this problem should disappear.
8. Change the DHCP Lease Time on Your Router
This is another more advanced solution, but it can be tried by users who are confident changing settings on their router.
The DHCP Protocol is what your router uses to automatically hand out IP addresses to devices on a network, but it only leases the use of these IP addresses for a certain amount of time, after which they expire and the router issues a new one to that device.
The user can manually adjust the length of this lease time, to make it longer, so that devices less frequently need to be re-assigned new IP addresses. It appears that sometimes, having DHCP lease times too short can cause this IP conflict error to appear more often.
Here are the steps to do this:
- Log in to your router. This usually means typing in a specific IP address into a browser address bar; it is often 192.168.0.1, 192.168.1.1 or 192.168.1.254 or may be something different. If you don’t know it, it will be on the back of your router somewhere along with the login admin/password.
- Once logged in, go to “Advanced Settings” or something similar.
- Select “LAN Setup/Settings” or something similar.
- Select “Address Reservation”, “DHCP Reservation” or similar.
- Look for a “Lease Time” setting, or something similar.
- Change it to 86,400 seconds, 1 day, or the maximum allowed.
- Save settings and log out of the router.
9. Change the Wireless Encryption Mode on The Router
This is another tip that does involve logging into your router, but isn’t really that difficult. Some users do report that changing the wireless encryption mode on the router can get rid of this IP conflict error. It can also solve a lot of other home networking errors.
Obviously only try this method if you are connecting via Wi-Fi.
Here are the steps:
- Log in to your router. This usually means typing in a specific IP address into a browser address bar; it is often 192.168.0.1, 192.168.1.1 or 192.168.1.254 or may be something different. If you don’t know it, it will be on the back of your router somewhere along with the login password.
- Once inside the router, look for “Wireless Settings“, or “Wireless Security“, or something similar.
- If your current encryption mode is set to WEP, try changing it WPA2-PSK (AES), and see if this fixes the problem.
- If this doesn’t work, you can also try any other wireless security encryption modes available on the router.