
This is an often requested feature for internet users – we sometimes might want to access our home router remotely, from the wider internet, when we aren’t at home. We might want to check out what current users are doing, making sure they aren’t hogging bandwidth, making sure there aren’t any neighbors/hackers using our router when we’re away. Or you might want to help non tech savvy friends/relatives fix something on their network, and need remote access.
Can we even do this though? Is there actually a way to log in to our router’s settings when we aren’t actually at home and in range of the router’s network?
The good news is that there is a way to access your router settings remotely from outside the local network, but it does require some initial setup. In fact, there are a couple of ways of doing it, some more complicated and in depth than others.
Therefore we’ll offer a quick/easy option for short term or one time access, and a more technically correct, long winded method if this is something you’re going to be needing to do regularly. Here’s a summary
- Quicker method – Enable remote access on your router, look up your router’s current public IP address, type this IP into any browser, enter the username/password to enter the router settings remotely.
- Harder method – Enable remote access on your router, set up a domain using NoIP and link it to your router login, and use this to access your router whenever you want remotely.
Now let’s run through each option in detail.
Note – if by “access router remotely”, you mean accessing it merely from a different room in the house, but still within range of it’s network, we’ve covered this in a separate guide. In this article, we’re covering how to access the router when you’re out of range of it’s signal (ie. from a totally remote location, outside of the local network).
Preliminary Step – Enable Remote Access On Your Router
Whichever method you use for accessing router settings remotely, one thing to bear in mind is that it can NEVER be done unless Remote Access is enabled from within your router settings already (it’s usually disabled by default).
This is one downside – if you’re out and about and suddenly find the need to access your home router remotely, but haven’t already enabled remote access on it, you won’t be able to do it unfortunately, unless you’ve got someone currently in the house to do if for you using the steps below.
You always need to enable remote access on your router first. Here’s how:
- Log in to the router’s setting page using the access URL/username/password listed on the sticker on the back. Type the login URL (eg. 192.168.0.1) into any browser address bar, plus the username/password listed on the label, to access the settings. See here if stuck.
- Once inside the router settings, you’re looking for Remote Access or Remote Management settings. Sometimes it might be under Advanced settings. It will vary across router brands:
-
- Netgear – Settings….Remote Management
- DLink – Tools….Administration…..Enable Remote Management
- Linksys – Administration…..Remote Management.
- TP Link – Security…..Remote Management.
-
- Make sure Remote Management is Enabled, and make a note of Port Number for remote access, plus the router login username/password you used to get into the settings (you’ll need all of these to access the router remotely).
- For quick one time or short term remote access, also note down the router’s WAN/public IP address from within the router settings (eg. 77.121.45.224). Or use one of those “what is my IP” tools online. This is the IP address currently assigned to your router by your ISP.
Easy Method To Access Router Settings Remotely (One Off/Short Term Access)
This method can work if you know in advance that you’re going to need one time or short term access to your router from outside the local network, and you can plan in advance, or if you have someone at home who can help you when you need to access the router remotely.
You just need to be able to know the router’s CURRENT public/WAN IP address (it does change regularly).
You’ve a couple of options for this:
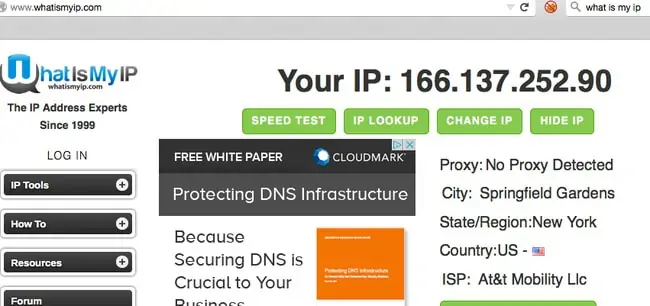
- Before you leave the house, go to whatismyip.com and note down the current public IP listed, along with your router login username/password, plus remote access port from the router settings.
- Or get someone else currently connected to the router to do this when you need remote access (it’s easy to find the current public IP of a router for anyone at home). They can also enable remote access as well if it hasn’t already been enabled, using the steps detailed above.
- Or look it up from within the router settings before you need remote access.
- Or open up the Command Prompt, type in ipconfig, and then note down the IPv4 address. See here for help on this.

As long as you have the public IP address of the router and it hasn’t changed, AND you have remote access enabled, you actually don’t need anything else for remote access other than the normal login credentials.
Here’s how you gain remote access with the router’s public IP.
- Get the router’s current public IP address in one of the ways listed above.
- Type the router’s current public/WAN IP into any browser address bar (even on a different network to the router’s local one).
- If remote access is enabled, a login screen should come up.
- Enter the normal router username/password you’d normally enter to gain access. Sometimes you might also need the remote access Port Number, which you should have noted down earlier, either in a separate box or with a colon straight after the router IP (eg. 172.65.34.42:8080).
- You should now be in the router settings, and be able to configure them remotely in the same way you would locally.
Harder Method To Access Router Settings (Long Term/Repeated Access)
Whilst it’s great of you can get it to work, the easy/quick method does have a couple of downsides:
- It only works if you actually know, or can find out, your router’s current public IP address at the time you want access. If you noted it down recently and it hasn’t changed, or will always have someone connected to that router at home at the time who can look it up when you need access, it can still work, but this won’t always be the case.
- The public IP address assigned to a router can and does change at regular intervals unless you rent a static IP from your ISP. Therefore what was your router’s public IP two weeks ago may not be it’s IP now, and the quick method won’t work if you don’t have the current router IP.
Therefore while it can work on a one-time basis, the quick method won’t always be suitable, and you need to a way to more regularly access your router’s settings remotely, even if it’s public IP address changes frequently.
This is where you need to use the more advanced method of linking your router’s settings login page to a custom domain (eg. davedodgerouterlogin.com) that will always allows you access.
The good news is that while it takes a little longer, it offers a more permanent way to reliably access your router from the wider internet, regardless of what happens to your router’s public IP, and it can also still be done for free with the NoIP service.
Here are your general steps to do this:
Step #1 – Log into your router using the steps detailed above, and find Dynamic DNS options. It may under DNS or Advanced or Network settings, but you may have to look around for a bit, as every router interface is different. Some router brands (eg. TP Link) offer their own free DDNS service, so you don’t even need to use NoIP. If your router doesn’t have NoIP as a selectable option, or doesn’t even have DDNS, see here for help, or the embedded video below.
Once you find it, enable Dynamic DNS
Step #2 -Then go over to noip.com and register for a free account. Enter all your details as instructed, and create a new domain (this is what you’re going to link to your router login page, so make it something memorable and personal to you, like accessmildredsrouter.ddns). No IP have a bunch of free domain extensions you can use. See here for a quick demo video of how to set up a free domain with them.

Step #3 – Head back to your router’s Dynamic DNS settings and plug in the domain you’ve registered into the domain name box. If you’re asked for a username/password, plug the ones you used to create the NoIP account in. Set Time Out to 1 hour if present, and click Add Domain/Save/Confirm or similar.
Setting Up Dynamic DNS With NoIP
As long as the details are correct and the router syncs up with your NoIP account, your router login access URL is now fully linked up with the domain name you just set up, and NoIP will regularly connect up with your router to check and log it’s current public IP, so even when it changes, it’s still connected to your NoIP domain.
Therefore, whenever you type in this custom domain name you set up, even outside your local network, you should be redirected to your router’s login page, and you just need to enter the router login credentials as you normally would to access your router’s setting from anywhere you like remotely.
Sometimes, depending on the router and setup, you might also need to enter the Remote Access Port Number as well, either separately (eg. 8080), or after your custom domain name with a colon (eg. accessmyrouter.ddns:8080).
Therefore always make sure you always have ALL the following details to hand whenever trying to access your router login remotely:
- Current public IP of the router if you can get it (means you can do it the easy way instead as shown in the first method further above)
- Remote Access Port Number
- NoIP account login details.
- Free domain details
- Router login username/password
This process normally works fine, but see here for NoIP’s troubleshooting guide if for any reason, this DDNS setup doesn’t work and your router doesn’t sync up with your NoIP domain.