
This is a common problem for users on congested home networks, where we find our gaming or streaming especially interrupted because the network is busy, with lots of devices connecting at once. Is there a way to prioritize one specific device above all others to try and stop this happening?
Fortunately, there is a setting available on some routers called Quality of Service or QoS, which is designed specifically for this purpose – to set priority for devices and manage congestion on busy home networks, to ensure critical devices do not have their traffic and user experience so badly interrupted or affected by other devices on the network.
Here are the very quick steps for setting QoS:
- Find the MAC address of your device.
- Log into your router (type 192.168.0.1 or 192.168.1.1 into any browser)
- Enter the router admin/password
- Find QoS Settings if they are available
- Select your device using it’s MAC address
- Set the priority to Highest or Maximum.
- QoS is not available on all routers.
For anyone not familiar with technology, don’t worry, we’ll run through a step by step process of how to do it. You just need to find your device’s MAC address, go into your router and prioritize your device in QoS settings (if available).
Let’s run through each step in more detail.
Step #1 – Find the MAC Address of Your Device
This can actually be the trickiest step, as every device has a slightly different menu system. But usually with a bit of searching, you can find the MAC Address of a device from within the Connection Settings/Status menus.
See this useful guide for finding the MAC address of all major devices; we’ll list some of the more common ones below:
1. Windows 7 – Go to Control Panel.…Network & Sharing/Network & Internet.….Change adapter settings. Right click on the connection (Wi-Fi or ethernet) currently in use, and click Status. Then click Details, and a list of settings, including the MAC Address, should come up to note down.
2. Windows 10 – If on Wi-Fi, click the Wi-Fi symbol in the bottom right, then click Network Settings. On the Settings screen that comes up, click Properties, and a list of settings, including the Physical MAC Address, should come up. If on ethernet, go to Settings…..Network & Internet…..Ethernet. Click on your current connection, then click Properties, and the same list should appear to note down.
3. iPhones/iPad– Go to Settings….General….About. The MAC address is listed further down as the “Wi-Fi Address”
4. Android – Can very a little between devices, but in general: pull down from the top of the screen, tap the Gear icon and then tap the Settings app to open it. Go to Wireless & Networks and tap Wi-Fi, then tap the menu button and then tap Advanced. The MAC address is displayed at the bottom.
5. macOS – Open the Apple menu, go to System Preferences…..Network. Select your connection, then click Advanced. The MAC address is displayed on the Hardware tab.
6. Games Consoles (PS4/PS5/Xbox One/Xbox X) – Go to Settings…..Network……View Connection Status/Connection Settings.
See the linked article above for finding the MAC for more specialized devices that aren’t listed here.
Once you’ve found the MAC address, just note it down, as you’ll need it to set the priority for that device on the router.
Step #2 – Log Into Your Router
This is the bit that intimidates some non-technical users, but it’s really not that hard. You can log into your router from any device with an internet browser with a few simple details that are always on the back of the router itself.
Check your router for a sticker with login details; it’ll look something like this:
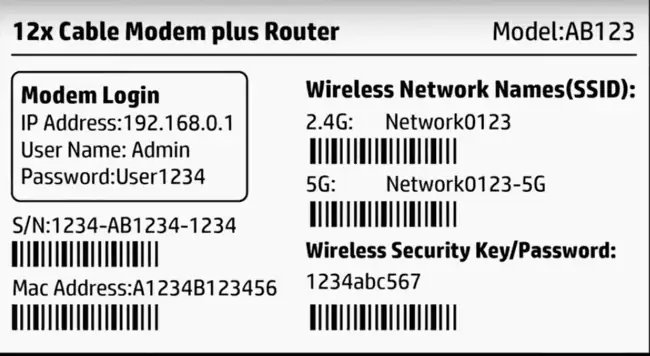
Note down the Login IP, Username and Password, the go to any device with a browser and do the following:
- Log in to your router. This usually means typing in a specific IP address into a browser address bar; it is often 192.168.0.1, 192.168.1.1 or 192.168.1.254 or may be something different. If you don’t know it, it will be on the back of your router somewhere along with the login admin/ password, or Google it.
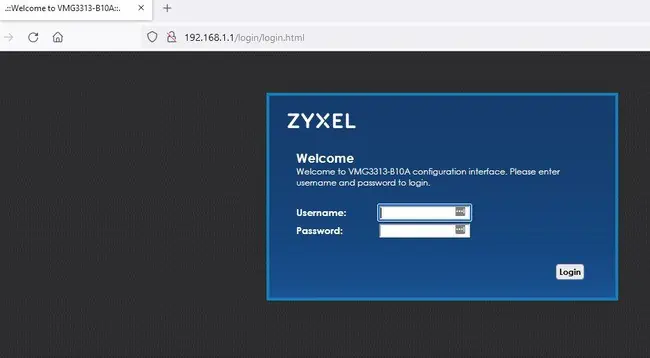
- Type in the admin and password – again will be on the router somewhere or online.
- See here for our full help guide if you’re struggling to access your router settings page.
- If someone has changed these then you’ll need to get the details off them or do a full factory reset of your router to reset all logins to default.
Step #3 Find & Configure QoS Settings
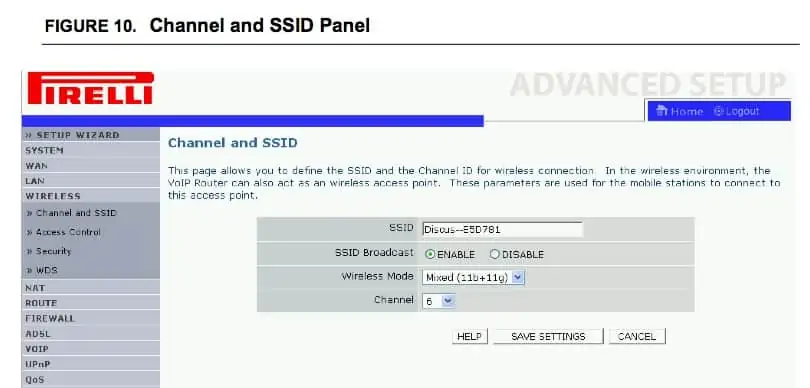
Once you’re into your router, you need to find Quality of Service or QoS settings if they’re available (unfortunately some routers don’t have it). It’s usually just on a side menu on it’s own as QoS, or it may be under a Network, LAN, Devices or Advanced tab or something similar. Different routers have different interfaces so you might have to search around the menus a bit.
See the example below of a router menu page – the QoS setting is on it’s own right at the bottom, but it will differ with each router.
Once you’ve found QoS it’s just a matter of setting your device to have the highest or maximum priority. Then save settings and exit the router. On most routers, the connected devices should all be listed, and you just need to select your device by it’s MAC address you noted down earlier.
There will usually then be an option to set the Priority of the device, usually in a drop down box. Set your device to Highest or Maximum priority, and set all other devices to a lower priority, to prioritize your device on the network. On other routers, you may have to actually enter the MAC address and set the priority manually (there might be an Add/Add Device option in the QoS menu). Again different routers have different ways of handling this setting, but it’s not too difficult to configure it once you’ve found it.
How QoS Works
Once configured, this means that the router will handle traffic flow to and from your device first, before all other devices. This can help with network congestion, although if bandwidth usage is high, it may negatively affect other user’s experience on their devices. It is a setting specifically designed manage traffic and set priority for different devices on a network.
The normal priority for QoS for devices on a standard home network runs as follows:
- Gaming – Games consoles don’t tend to use much bandwidth for online gaming, but they do need Maximum priority on busy home network to keep ping or latency low. So it’s usually games consoles that are prioritized using QoS.
- Videocalls/Webinars – Skype, Zoom etc. Can be High or Maximum priority, especially if being used for work purposes.
- Streaming – Less latency sensitive, but uses much more bandwidth, so does need a medium to high priority to prevent buffering on busy networks, especially when streaming in HD.
- General Browsing – Email, Social Media, general site browsing. Usually bottom of the list with the lowest priority, just because a slight delay in loading pages doesn’t affect the experience as much as with gaming/streaming.
Of course, using QoS, a user can override this and give their device any priority they want, putting streaming devices to Maximum and everything else lower. It just depends on which device(s) seem to get most affected when the network is busy, and give them more priority to try and lessen these issues.
What If My Router Does Not Have QoS?
QoS is not available on all routers, especially some bespoke ones supplied by ISPs. Most branded third party routers will have QoS settings in their configuration panel.
What options are available in these cases where QoS isn’t available?
We can think of a few other solutions to this problem:
Solution #1 – Wired Connections – The first priority for any critical device that needs priority should be to get off Wi-Fi and onto a wired ethernet connection instead. Ethernet connections are much better than Wi-Fi, since they are a dedicated, un-congested communication channel to the router, whereas devices on Wi-Fi have to share the space with other wireless devices, leading to congestion and lag/buffering issues.
If you can get onto a wired connection, then your congestion problems should automatically reduce, even on busy home networks.
Solution #2 – Powerline Adapters – If you cannot get easily get onto a direct wired ethernet connection because you are too far away from the router, then a Powerline Adapter is a next best solution for critical devices, which effectively still gets you on a wired connection, but by a different method.
Powerline adapters consist of a pair of adapter plugs which can transmit data through the existing house wiring, effectively delivering a wired ethernet connection, without the need to run long cables through the house.