This is an annoying but quite a common home networking problem – when you want to connect to your router, but it isn’t actually appearing on the list of Wi-Fi networks when you do a search.
Other nearby networks may appear, like your neighbor’s, but your own router may not.
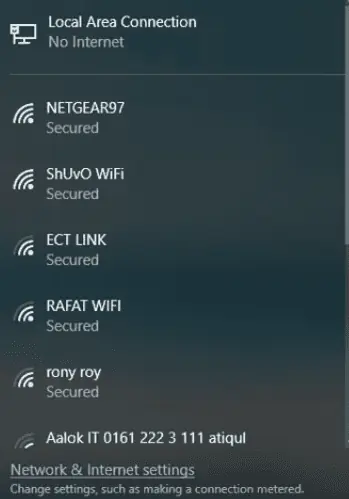
“Where is my network!”
There are actually several reasons this can happen, but it most often boils down to router or device settings being out of sync in some way.
If your router is not displaying on the Wi-Fi network list, it is usually either because you are not in close enough range to pick up the signal, or the router’s SSID has been set to not broadcast itself from within the configuration panel.
Here are the most common solutions if you cannot find your router on your Wi-Fi network list:
- Make Sure Wi-Fi hasn’t been disabled on your device.
- Quickly reset your router and device
- Make sure you are in range and check for interference.
- Make sure SSID Broadcast is enabled on the router.
- Turn on WLAN Autoconfig service
- Update Wi-Fi network drivers on your device
- Switch the channel on your router.
- Switch the region on your device (Windows 7)
Let’s run through each option in turn, with steps on how to do each one.
1. Make Sure the Wi-Fi is Enabled on Your Device
This is the very first thing to check – that the Wi-Fi isn’t actually disabled on your device. Look for a small Wi-Fi LED somewhere on the laptop – make sure it is actually on.
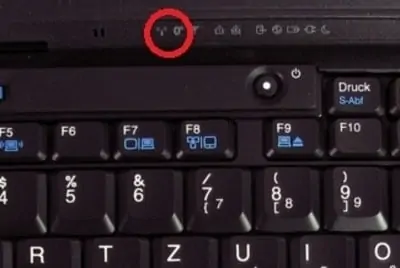
Pressing the Fn+F5 or Fn+F10 keys are the two most common ways of manually enabling the Wi-Fi on your laptop, or else Google your make and model and how to enable Wi-Fi shortcut.
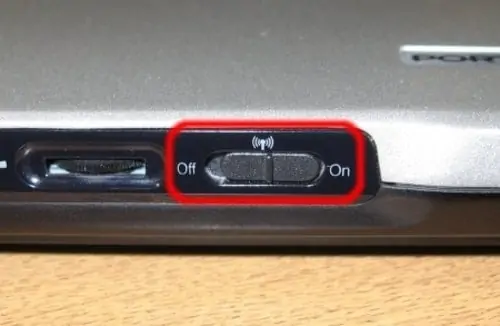
On some laptops, there can also be a toggle switch/tab on the actual device itself to switch the Wi-Fi on or off. If your device does have this, make sure it is set to On.
2. Reset Your Router & Device
This is another quick tip that can sometimes work – just restarting your router and device can sometimes refresh the Wi-Fi signal and allow you to connect.
Here are some quick things to try:
- Try quickly restarting your router and device with the power off/on button or the restart button.
- If this doesn’t work, you can try a full power cycle of the devices, powering them off and fully unplugging them from the wall socket for 5-10 minutes, before switching them back on.
Another thing to try to quickly refresh the wireless connection is to disable and then re-enable your wireless network adapter on your device.
Here are the steps to do this for Windows devices:
- Windows 7 – Go to Control Panel —- Network and Internet —– Network and Sharing Center
- Click Change Adapter Settings on the left
- For Windows 10 – Click the Windows sign (bottom left corner, then the Settings cog. Click Network & Internet, and under Advanced Network Settings, click Change Adapter Settings
- A list of wired and wireless internet connections configured on your computer should appear. Right click on the one you are currently using (wired or Wi-Fi) and then click Disable.
- Wait a few seconds for it to fully disable, then right click and Enable again.
- See it this restores the connection.
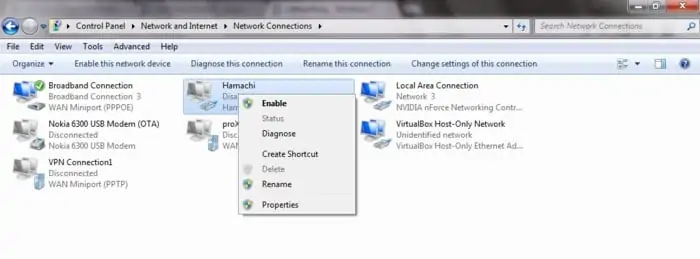
Disabling and re-enabling your network adapter can sometimes refresh the network
3. Make Sure You are in Range & Check For Interference
This is more of an obvious point, but should still be mentioned. Your router might not be showing up on the Wi-Fi because you are too far away from it, or there are too many obstacles in the way.
Make sure you are close enough to the router to pick up the signal. You may have difficulty connecting from outdoor buildings like garages, or from a very long distances, when there are lots of walls or floors in the way. Wi-Fi does weaken over distance.
Also be sure to check for any factors that can cause interference in the Wi-Fi signal:
- Keep your router and device away from any other RF emitting equipment like microwaves, household appliances, game consoles, security cameras and so on.
- Move closer to your router if necessary.
- Try to install your router in a central location in the house.
- Moving your router to a more elevated position can also sometimes help with the signal.
- Check that your ISP is not experiencing service disruption in your area.
4. Make Sure Your Router is Broadcasting the SSID
This can be a problem if you’ve recently switched to a new Wi-Fi network in a different house, and this network is set to be hidden, meaning it cannot be so easily found and does not show up on the “Available Networks” list, even if it is in range.
To change this, we can make the SSID visible again, if we have permission to access the router.
Here are the steps do to this:
- Log into your router as described above, using it’s IP address, admin and password. IP is most commonly 192.168.0.1 or 192.168.1.1 or 192.168.1.254.
- You are looking for Wireless, Wireless Settings, or possibly Security.
- There should be an option somewhere on SSID Broadcast or Visibility.
- If it’s currently turned to off, make sure this option is set to On or Enabled, or the box allowing SSID Broadcast or Visibility is checked.
- Alternatively, you may need to uncheck the option to Hide the Wi-Fi network/SSID. Different routers will handle this option in different ways (enable broadcast vs disable hidden network).
- There is also sometimes another option nearby to “enable x/x network co-existence”, or something similar (eg. 20 MHz/40 MHz). Try unchecking this as well (or switching the setting).

This is basically telling your router to send out a signal broadcasting it’s SSID (name) to nearby devices. It’s usually set to On by default, but can sometimes be turned off, meaning that the Wi-Fi router does not initially appear.
This option is perhaps most applicable if we have moved to a new house with a new router, or just changed to a new ISP. Obviously it is not recommended to go changing the settings on someone else’s router if you are a guest, without their permission.
5. Set WLAN Configuration to Automatic
In some cases the WLAN configuration is set to manual, meaning you have to manually enter your router’s name (SSID) and password to connect your devices.
In this case you have 2 options:
- Manually connect your device to the Wi-Fi
- Change WLAN configuration to Auto to let devices connect on their own without you needing to do anything.
In most cases, it’s probably best to simply enable Auto WLAN Config to save time in the future, but let’s run through each of these options.
Method #1 – Manually connect your device to the Wi-Fi for Windows 10:
- Go to Settings….Network & Internet
- Select Wi-Fi
- Select Manage Known Networks…..Add a New Network
- Enter the SSID (Wi-Fi name) into the box.
- Select the Security type (WPA standard is best now).
- Enter the Security Key (password)
- Select Connect Automatically if you want to connect to this network every time you are in range.
- Click Save
Method #2 – Turning on WLAN AutoConfig – here are the steps:
- Open up the Run box in Windows by searching for it in Settings, or typing the Windows key + R.
- Type services.msc into the Run box, as shown below.
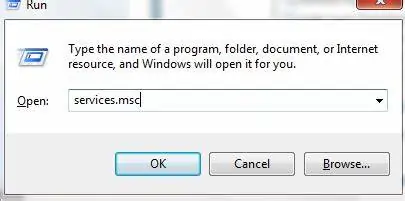
- The box shown below should appear. Find the WLAN AutoConfig option.
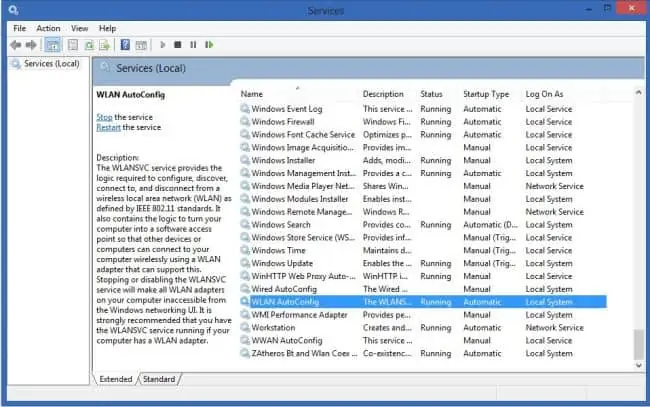
- Right click on WLAN AutoConfig and select Properties
- Under Startup Type, select Automatic
- Click Apply and OK to save settings and exit.
- Restart your device to see if this fixes the Wi-Fi problem.
6. Update Wi-Fi Network Drivers on Your Device
This is another thing that can sometimes stop you from finding Wi-Fi networks with your device – the network drivers are out of date. Updating them is usually very simple.
Here is a guide for Windows:
- Windows 7 – Go to Control Panel —-Device Management or open the Run box and type in devmgmt.msc and hit OK.
- For Windows 10 – Simply search for and select Device Manager in the bottom left corner search bar.
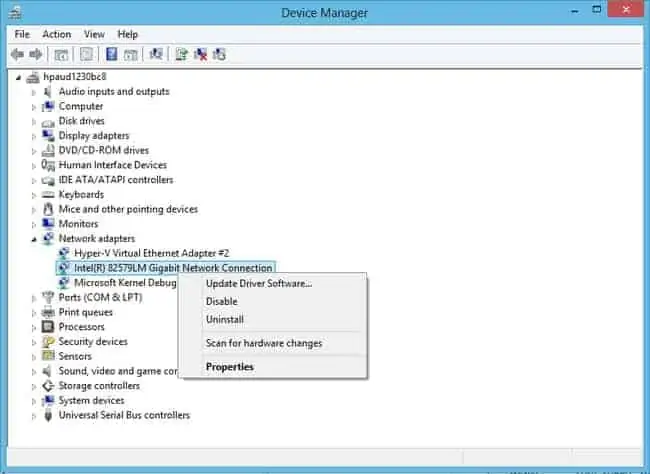
- A whole list of categories should appear. Select/double click Network Adapters
- Select your network/WLAN adapter for your device (usually at the top).
- Right click and select Update Driver.
- If there is an update, install it and see if this restores a better connection.
In rare cases, some users have actually found though that DOWNGRADING instead of upgrading the wireless network drivers has actually solved this problem. Using a previous version of network driver can restore the connection.
In this case you would go to Device Manager as described above, but select the option which says “Let me pick from a list of device drivers on my computer”, or something similar. You then just need to select on older driver version from the list and install that instead, and see if this solves the problem.
7. Change the Wi-Fi Channel on Your Router
This is a good user-submitted suggestion that’s sometimes helped to solve this problem. Some devices are only configured to find routers in a certain frequency/band, and if your router is operating on a channel/band outside this range, your device will not be able to find it.
For example, your router may be on channel 13, but your device may only be able to find routers on channels 1-11 (this can vary between different devices).
So setting your router to a different channel can fix this. Here are the steps:
- Log into your router as described above, using it’s IP address, admin and password. IP is most commonly 192.168.0.1 or 192.168.1.1 or 192.168.1.254.
- You are looking for Wireless, Wireless Settings, or something similar.
- There should be an option somewhere on Channel or Wireless Channel.
- The most common working range is 1-11, so if it’s outside this range, move it into this range (pick any channel between 1-11).
- If it is already within this 1-11 range, try experimenting with different channels to see if your device can find it.
- Save settings and exit router.
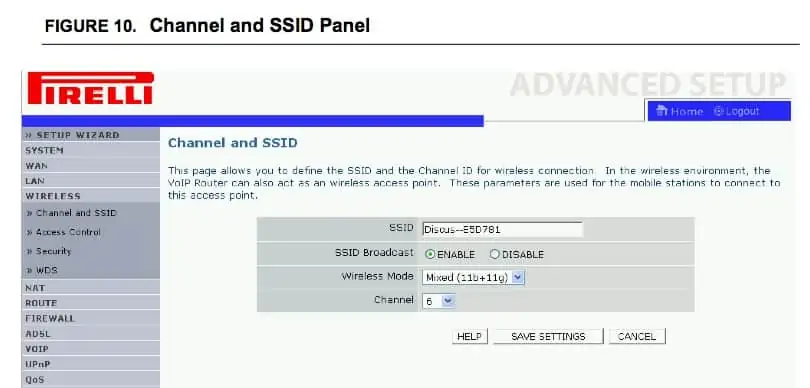
Make sure the Channel is set between 1-11
8. Switch the Region on Your Device (Windows 7 only)
This is really just a variant on point #7, a different way of achieving the same result. In some regions, devices are only configured to work with Wi-Fi on certain channels, so rather than changing the channel/band on the router, changing the region on your device can have the same outcome, allowing your router and device to “see” each other on the network.
Here are the steps to do this for Windows 7 devices:
- Go to Control Panel (Windows 7)
- Click on Network/Internet….Wi-Fi
- Find your Wi-Fi device/adapter, right click and select Properties
- Click on Configure, and go to the Advanced tab
- There should then be an option to change the region to something else. Try experimenting with different regions to your current one to see if you are now able to connect to the router.
- This option is only available on Windows 7 and not Windows 10 devices.
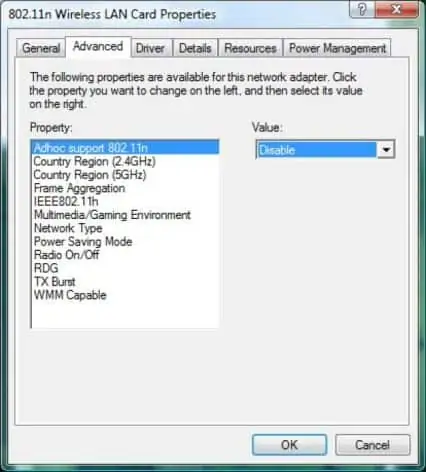
Change the Country Region to something else