The Brave browser is a relatively new, privacy friendly web browser, with a similar interface to the Chrome and Opera browsers in some respects, but with more privacy customization options.
But how do you actually clear your browsing history when using Brave? That’s what we’re going to cover in this article, both for desktop and Android devices. It’s really pretty simple and similar to other browser
- Press Ctrl + H to bring up History.
- Click Clear browsing data
- Select all categories of data and time range to be deleted.
- Click Clear data
And then for the Android app versions:
- Tap the 3 dots icon in the bottom right corner.
- Tap History
- Tap Clear browsing history.
- Click Clear data to wipe all Brave history
And it’s really that simple, but let’s go through illustrated steps for both desktop and mobile devices.
Deleting Brave History (Desktop Devices)
Wiping history off the desktop version of Brave browser is pretty simple and just a few clicks process:
Step #1 – Press Ctrl + H to bring up History. Alternatively, you can click on the 3 dots burger icon at the top right corner of the browser, and then select History on the menu that appears.
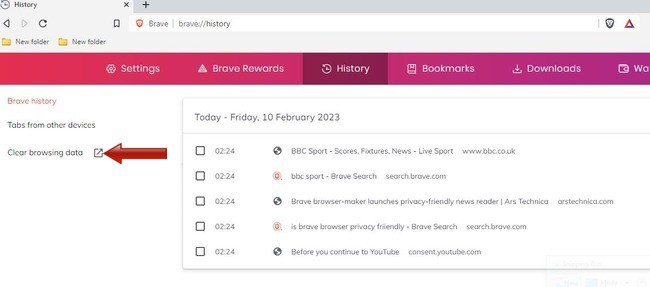
Step #2 – A list of history items should appear. Click on Clear browsing data on the left hand side:
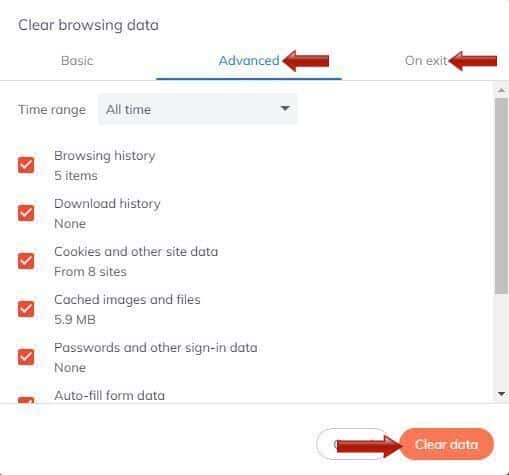
Step #3 – If you just want to clear ONLY browsing history, the Basic tab will do. If you want to clear more items, switch to the Advanced tab at the top and select more items. Also select the preferred time range to delete data (last hour/day/week/month/all time). It works much the same as Chrome and Opera here.
You can also switch to the On exit tab to select which items will be automatically deleted every time you close the Brave browser – a handy additional privacy option that saves you having to manually delete history every time you use it.
Click Clear data when finished. Wait a few seconds and all history plus other selected items will be deleted from the browser.
Delete Brave History (Android Devices)
Clearing history for the Android version of Brave found on phones/tablets is a bit different.
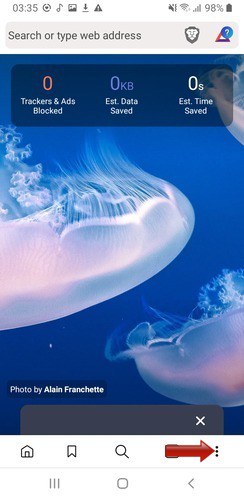
Step #1 – Bring Up Settings – Just tap the 3 dots icon in the bottom right corner of the app interface to bring up Settings.
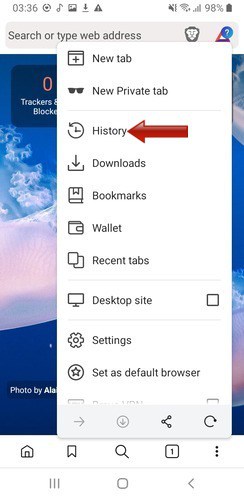
Step #2 – Tap History on the Settings menu that comes up:
Step #3 – A list of history items should appear. Tap clear browsing data at the top to get rid of everything:
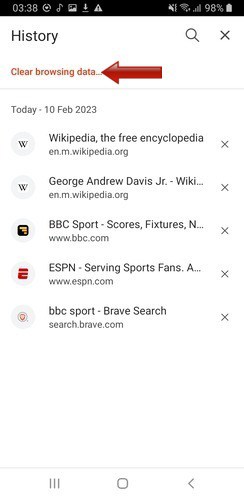
Alternatively, you can tap the X next to each individual history item to delete just that, if you want to be more selective about what history you clear.
Step #4 – Check all boxes and categories of data you want to clear (switch to the Advanced tab at the top if needed to select more items). Also select the time range you want to delete (last hour/day/week/month/all time) and tap Clear data at the bottom when done.
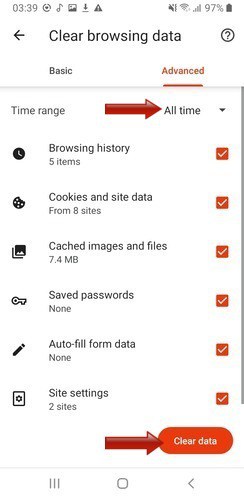
Wait a few seconds and all history plus other selected items are cleared from the app.
Preventing Brave Browser History Tracking With Private Window
Clearing history manually from Brave is one thing, but if you’d rather it just didn’t track History to begin with, there is a way of doing this.
You just need to only ever use Private Windows when using Brave:
- Desktop – Click Ctrl + Shift + N or click on the 3 lines burger icon Settings symbol in the top right corner, and select New Private Window.
- Android – Tap the 3 dots icon in the bottom right corner, and then select New Private Tab at the top.
There’s also an additional option in Brave to open a Private Window With Tor, which routes your traffic through multiple servers worldwide for even greater privacy. Speeds will be significantly slower though using Tor windows.
Using Private Windows at least makes your browsing invisible to anyone else on that same device; no browsing history is stored when using this mode, so no one can check what sites you visited when using this Window – history will be empty. Also, any cookies and other session data is wiped automatically as soon as you close any Private Window on Brave.
Be sure to always only use Private Windows if you’d rather this was always the case when using Brave.
Further Privacy Settings Recommendations For Brave
The Brave browser does have an intricate and detailed Settings menu where you can change a lot of stuff around. Specifically for better privacy, here are some recommendations:
Firstly, when clearing standard history from the browser (as illustrated above), be sure to also switch to the On exit tab on the history menu and select the items you want to be automatically deleted every time you close the Brave browser.
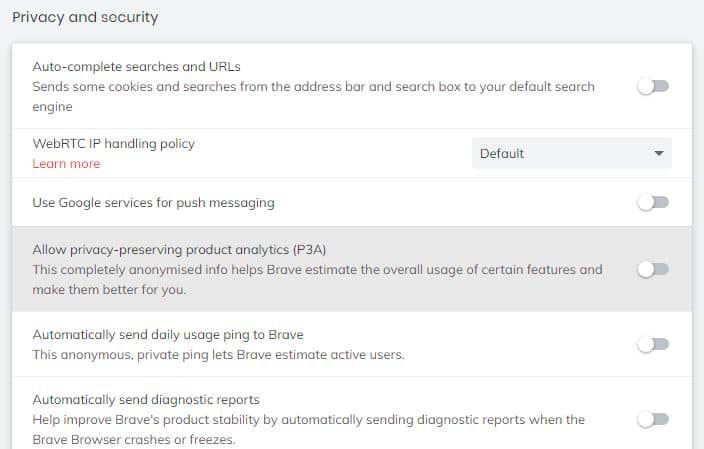
Then, go the Privacy & Security Tab on the left hand side, and toggle all the options at the top off. This makes sure you’re not sending any data out regarding browser use, even if it is supposedly “anonymized”. Toggle it all off to avoid any doubt or uncertainty – none of these settings need to be on and your experience isn’t affected by turning them off.
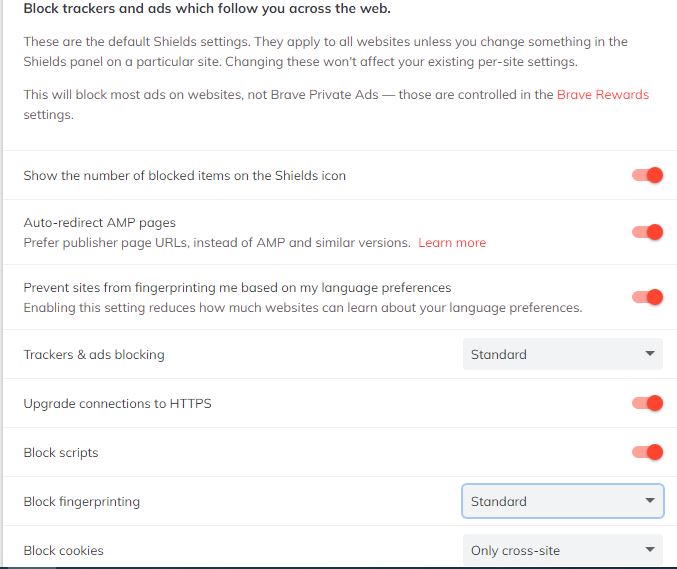
Then go to Shield settings on the left hand side and these are some recommended settings that balance functionality and privacy:
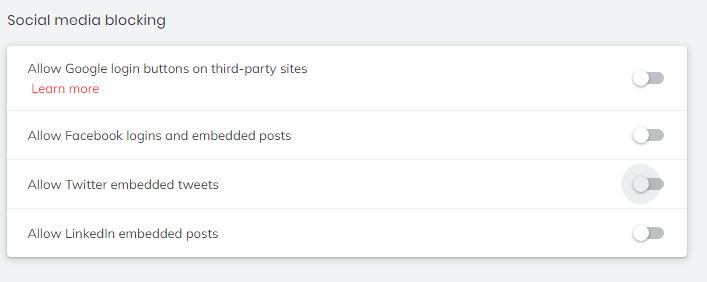
There’s also a Social Media blocking tab where you can toggle off certain settings for better privacy:
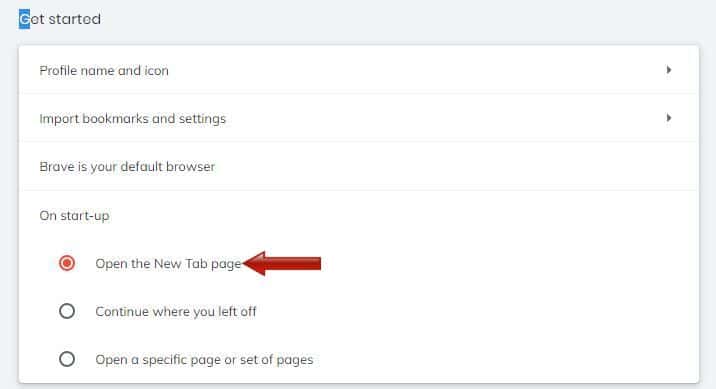
And lastly, a Startup tab, where you are best select Open a New Tab page. If you keep it on “continue where you left off”, it opens up the last page you were on before you last closed the browser, which may not be good for privacy.
Other Places To Delete Browse History
As long as you clear any Brave browser history, and disable any tracking going forward, you’ve at least sorted out everything from the browser side of things.
But user history is also stored in a couple of other places; here are tips for this:
- Routers – Browse history is sometimes also stored on routers. You can clear this as well – you can delete the logs from within the router settings, or do a factory reset to wipe all history.
- ISPs/agencies – Some internet providers also collect and store user history. Your best way to avoid this kind of tracking is to use a VPN, which hides your real location and IP address and keeps your browsing anonymous.
